Technology
How to Get Started with a Wood Burning Kit
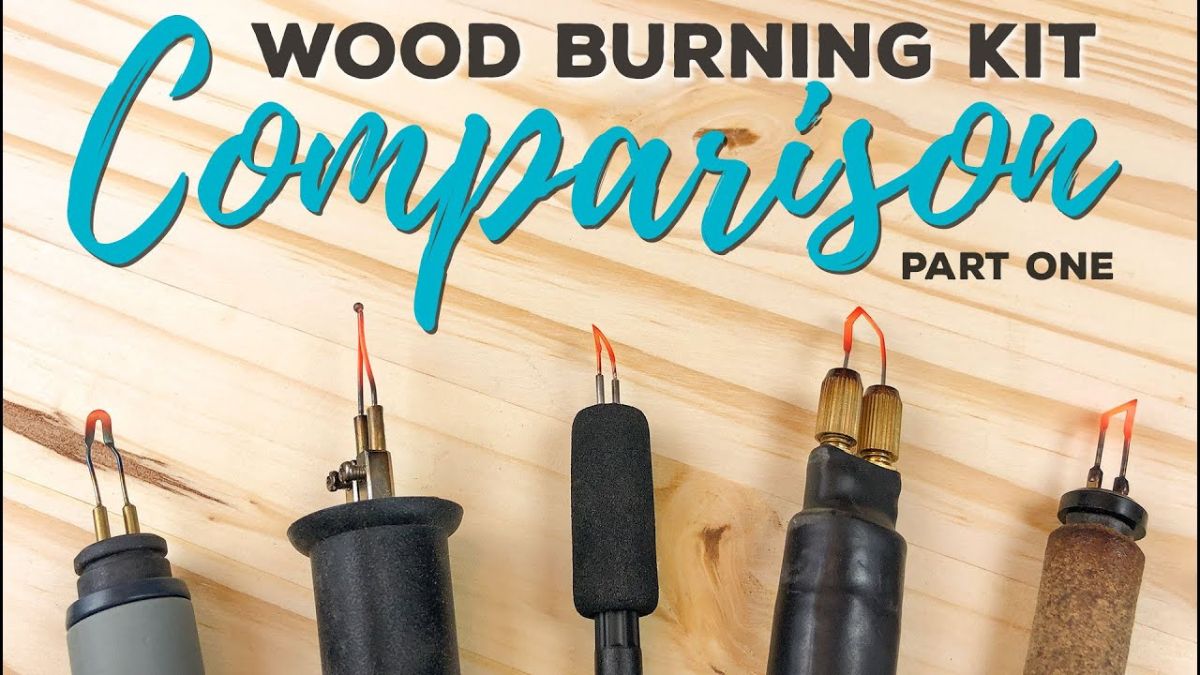
Are you looking to unleash your creativity and add a touch of artistry to your woodworking projects? If so, then it’s time to dive into the fascinating world of wood burning! With just a few simple tools and some basic techniques, you can transform ordinary pieces of wood into stunning works of art.
Wood burning, also known as pyrography, is an ancient art form that involves using heated metal tips to create intricate designs and patterns on wooden surfaces. Whether you’re a seasoned artist or a complete beginner, this step-by-step tutorial will guide you through the process of getting started with a wood burning kit.
In this comprehensive guide, we’ll discuss everything from selecting the right kit for your needs to mastering essential techniques and troubleshooting common issues. So grab your favorite cup of coffee (or tea!) and let’s embark on this creative journey together. Get ready to unlock your artistic potential with wood burning!
What is Wood Burning?
Wood burning, also known as pyrography, is an art form that involves using a heated pen-like tool to create intricate designs and patterns on wood surfaces. By applying controlled heat to the wood, artists can achieve a range of shading and textures, resulting in stunning works of art.
This ancient technique dates back centuries and has been used by various cultures around the world. Today, wood burning continues to be popular among artists and hobbyists alike. It offers a unique way to express creativity while working with natural materials. Whether you’re interested in creating personalized gifts or adding a rustic touch to your home decor, wood burning can be a rewarding craft to explore.
Benefits of Wood Burning
Wood burning is not just a hobby, it’s an art form that comes with numerous benefits. First and foremost, wood burning allows for self-expression and creativity. With a wood burning kit in hand, you have the power to create intricate designs and patterns on various wooden surfaces.
Additionally, wood burning can be quite therapeutic. The process of focusing on the detailed strokes and watching your artwork come to life can help reduce stress and promote relaxation. It also provides a sense of accomplishment as you see your skills improve over time. So if you’re looking for a unique way to unleash your creativity while enjoying some much-needed me-time, wood burning is definitely worth exploring!
Selecting the Right Wood Burning Kit
Selecting the right wood burning kit is essential to ensure a successful and enjoyable experience. With so many options available, it can be overwhelming to choose the perfect one for your needs. There are different types of wood burning kits, including basic ones for beginners and advanced ones for more experienced artists. Considerations such as temperature control, tip variety, and ease of use should also be taken into account when making your decision.
When selecting a wood burning kit, think about what type of projects you plan on working on. If you’re just starting out, a basic kit with a few interchangeable tips may be sufficient. However, if you have specific designs in mind or want to experiment with different techniques, investing in a more versatile kit with multiple tip options would be beneficial. Additionally, look for kits that offer temperature control features so that you can adjust the heat depending on the type of wood or design you are working with.
Remember that choosing the right wood burning kit is an important step towards achieving great results in your artwork. Take some time to research different brands and read reviews from other users before making your final decision. By selecting a high-quality and suitable kit for your skill level and project requirements, you’ll set yourself up for success in this fascinating craft!
Types of Wood Burning Kits
When it comes to wood burning, there are several types of kits available that cater to different skill levels and preferences. One popular option is a basic wood burning kit, which typically includes a variety of interchangeable tips or nibs that can be used for different effects or techniques. These kits are perfect for beginners who want to explore the art of wood burning without investing in more advanced tools.
For those looking for more versatility and control, there are also temperature-controlled wood burning kits. These kits often come with adjustable heat settings, allowing users to precisely control the intensity of their burn marks. This makes them ideal for artists who want to create intricate details or shading in their wood burning projects.
Choosing the right type of wood burning kit depends on your skill level and desired outcomes. Whether you opt for a basic kit or invest in a temperature-controlled one, each type has its own benefits and can help you achieve beautiful results in your artwork.
Considerations When Choosing a Kit
When it comes to choosing the right wood burning kit, there are a few important considerations to keep in mind. First and foremost, think about your skill level and experience with wood burning. Are you a beginner looking for a basic kit to get started? Or are you more advanced and in need of a kit with more advanced features?
Another consideration is the type of projects you plan on working on. Different kits may come with different tips and accessories that cater to specific types of wood burning techniques or designs. It’s also important to consider the quality of the kit itself. Look for kits made from durable materials that will stand up to frequent use.
Additionally, think about your budget when selecting a wood burning kit. Prices can vary significantly depending on the brand and included features. It’s worth investing in a high-quality kit if you plan on using it frequently, but if you’re just starting out or unsure if wood burning is something you’ll enjoy long-term, opting for a more affordable option may be wise.
Remember these considerations as you choose the perfect wood burning kit for your needs!
Gathering Materials and Tools
To get started with wood burning, it’s important to gather the right materials and tools. First, you’ll need some essential materials such as a piece of wood (preferably softwood), sandpaper, and carbon transfer paper. These items will help ensure smooth and successful wood burning.
Next, it’s time to gather your recommended tools for beginners. Some basic tools include a wood burning pen or pyrography machine, interchangeable tips in various shapes and sizes, pliers for changing tips safely, and a heat-resistant surface or stand to work on.
With these materials and tools at hand, you’ll be ready to embark on your wood burning journey! Remember that practice makes perfect when it comes to mastering this art form. So let’s move on to preparing your workspace!
Essential Materials for Wood Burning
When it comes to wood burning, having the right materials is essential for creating beautiful and long-lasting artwork. Here are some must-have supplies to get started:
First and foremost, you’ll need a variety of wooden surfaces to work on. Opt for softwoods like pine or basswood, as they are easier to burn and provide a smooth canvas for your designs. Next, invest in a set of high-quality wood burning tips with different shapes and sizes. These tips will allow you to create various textures and details in your artwork.
In addition to the basics, don’t forget about safety equipment such as heat-resistant gloves to protect your hands from burns. A dust mask is also recommended when working with certain types of wood that may produce fine particles during burning. Have a supply of sandpaper on hand for smoothing out any rough edges or mistakes that may occur during the process. With these essential materials at your disposal, you’ll be well-equipped to embark on your wood burning journey!
Recommended Tools for Beginners
When it comes to getting started with wood burning, having the right tools is essential. As a beginner, there are a few key tools that you’ll want to have in your arsenal. First and foremost is a good quality wood burning pen or tool. Look for one that has adjustable temperature settings and interchangeable tips so you can experiment with different effects. Additionally, having a variety of sandpaper grits on hand will help you smooth out any rough edges and prepare your wood surface for burning.
Another important tool for beginners is a set of carving knives or chisels. These will come in handy when you’re shaping and detailing your designs before burning them into the wood. Don’t forget about safety equipment! Investing in a pair of heat-resistant gloves and wearing protective eyewear can greatly reduce the risk of accidents while working with hot tools. With these recommended tools by your side, you’ll be well-equipped to embark on your wood burning journey with confidence!
Preparing Your Workspace
Setting up a safe and comfortable space is crucial before diving into the world of wood burning. First, ensure you have adequate ventilation in your workspace to avoid inhaling any fumes or smoke produced during the process. It’s also important to have a sturdy table or workbench where you can comfortably sit and work for extended periods.
Next, organize your tools and materials in a way that suits your workflow. Keep them within easy reach so you don’t waste time searching for what you need. Consider using containers or dividers to keep everything neat and organized. With a well-prepared workspace, you’ll be ready to unleash your creativity through wood burning!
Setting Up a Safe and Comfortable Space
Setting up a safe and comfortable space is crucial when getting started with wood burning. First, ensure you have good ventilation in your workspace to prevent smoke buildup. A well-ventilated area will also help keep you comfortable during long hours of burning. Next, make sure your work surface is stable and heat-resistant. Use a fireproof mat or a metal sheet underneath your project to protect the surface from heat damage. Keep a fire extinguisher nearby for added safety. Wear protective gear such as gloves and safety goggles to shield yourself from potential burns or flying debris.
Organizing your tools and materials is another important aspect of setting up your wood burning space. Have a designated area where you can easily access all necessary supplies like different tips for varying effects, sandpaper for smoothing out rough surfaces, and graphite paper for transferring designs onto the wood. Consider using containers or organizers to keep everything tidy and within reach while working on your projects. By creating an organized setup, you’ll be able to work more efficiently without wasting time searching for items or risking accidental injuries caused by disorganized clutter.
Organizing Your Tools and Materials
When it comes to wood burning, organization is key! Keeping your tools and materials organized not only helps you work more efficiently but also ensures a safer workspace. Start by designating a specific area for your wood burning projects. Clear off a table or set up a desk where you can comfortably spread out your tools and materials.
Next, take the time to arrange everything in an orderly manner. Use small containers or trays to hold different types of tips, pens, and other accessories. Label them if necessary so that you can easily find what you need during a project. Keep your wood pieces neatly stacked nearby for easy access. By organizing your tools and materials beforehand, you’ll be able to focus on creating beautiful wood burning art without any unnecessary distractions!
Understanding Wood Burning Techniques
Exploring Different Types of Wood Burning Tips
When it comes to wood burning, there is a wide array of tips or nibs available that can create various effects and textures on the wood surface. Some popular options include pointed tips for fine details, shading tips for smooth transitions, and calligraphy tips for elegant lettering. By experimenting with different tips, you can discover your preferred style and achieve unique results.
Learning Basic Wood Burning Strokes and Techniques
To master wood burning, it’s essential to familiarize yourself with basic strokes and techniques. These include lines strokes (straight lines), curved strokes (for creating rounded shapes), stippling (dotting the tip on the surface for texture), and shading (gradually darkening an area). Learning these fundamental techniques will provide a solid foundation upon which you can build your skills and creativity in wood burning art. So don’t hesitate to practice each stroke until you feel comfortable controlling the heat of your tool. With time and practice, you’ll develop confidence in executing intricate designs!
Exploring Different Types of Wood Burning Tips
When it comes to wood burning, there are a variety of tips that you can use to create different effects and textures on your artwork. The type of tip you choose will depend on the design or pattern you want to achieve. Some common types of wood burning tips include shading tips, writing tips, and detailing tips.
Shading tips are great for creating smooth gradients or adding depth to your artwork. Writing tips have a pointed tip that is ideal for outlining letters or creating fine lines. Detailing tips have smaller and more intricate designs that allow for precise detailing work. Experimenting with different types of wood burning tips can open up a world of possibilities and help you discover unique techniques to enhance your artwork!
Learning Basic Wood Burning Strokes and Techniques
Understanding the basic wood burning strokes and techniques is essential for creating beautiful designs with your wood burning kit. By mastering these fundamental skills, you’ll be able to add depth, texture, and intricate details to your artwork.
Start by practicing the basic stroke of wood burning: the straight line. Hold your tool at a slight angle and apply gentle pressure as you move it across the surface of the wood. Experiment with different speeds and pressures to achieve varying shades of darkness. Once you’ve mastered the straight line, try branching out into curves, circles, and other shapes to expand your repertoire of strokes. With practice, you’ll develop a steady hand and gain confidence in your ability to create stunning wood burned designs!
Starting Your First Wood Burning Project
Starting your first wood burning project is an exciting and creative endeavor. The first step is to choose a suitable design or pattern that you would like to create on your piece of wood. This could be anything from a simple shape or letter, to a more intricate image or scene.
Once you have decided on your design, the next step is to transfer it onto the wood. You can do this by either freehand drawing directly onto the wood with a pencil, or by using transfer paper to trace the design onto the surface. It’s important to take your time during this process and ensure that the design is accurately transferred before moving on.
Now that you have your design ready, it’s time to start practicing your wood burning skills. Begin by experimenting with different tips and techniques on scrap pieces of wood until you feel comfortable and confident in controlling the heat and creating various effects. Remember, practice makes perfect!
Starting your first wood burning project may seem daunting at first, but with patience and practice, you’ll soon be creating beautiful artwork that showcases your talent and creativity! So don’t hesitate – grab your wood burning kit today and let your imagination soar!
Choosing a Suitable Design or Pattern
Choosing a suitable design or pattern is an exciting part of starting your wood burning project. The possibilities are endless, allowing you to unleash your creativity and showcase your unique style. Whether you prefer intricate designs or simple patterns, selecting the right design is crucial for creating a visually appealing piece.
Consider the theme or purpose of your artwork. Are you looking to create a nature-inspired scene? Or perhaps something more abstract and modern? Take some time to browse through different sources like books, websites, or even nature itself for inspiration. Once you have a general idea in mind, sketch out some rough drafts on paper to visualize how it will look on the wood surface. Remember that simplicity can sometimes make a powerful statement, so don’t be afraid to start with basic shapes and gradually add details as you gain more experience.
Transferring the Design onto the Wood
Transferring the design onto the wood is a crucial step in creating your wood burning artwork. There are several methods you can use to transfer your chosen design or pattern onto the wood surface. One popular technique is using carbon paper or graphite paper, which allows you to trace the design directly onto the wood with ease.
Another method involves printing out your desired design on regular printer paper and then using transfer paper to transfer it onto the wood. This method works well for more intricate designs that may be difficult to trace by hand. Whichever method you choose, make sure to secure your design firmly onto the wood surface before starting your wood burning project.
Remember, transferring the design accurately will ensure that you have a clear guideline to follow during the actual burning process. Take your time with this step and double-check that everything is aligned correctly before moving forward. With practice, you’ll become proficient at transferring designs and be ready to bring them to life through wood burning!
Practicing Your Wood Burning Skills
Now that you have your design transferred onto the wood, it’s time to start practicing your wood burning skills! Take a deep breath and steady your hand as you begin applying the heated tip to the surface. Start with light pressure and slow, deliberate strokes to create smooth lines. Remember, practice makes perfect, so don’t be discouraged if your first attempts aren’t flawless.
As you gain confidence in your technique, try experimenting with different stroke patterns and textures. You can vary the depth of your burn by adjusting the pressure applied or using different tips. Don’t be afraid to make mistakes; they can often lead to unexpected artistic discoveries. With each project, you’ll refine your skills and develop a unique style all your own. Keep pushing yourself creatively and enjoy the process of learning and improving as a wood burning artist!
Finishing and Protecting Your Wood Burning Artwork
Applying the finishing touches to your wood burning artwork is crucial in preserving its beauty and ensuring its longevity. After you have completed your design, it’s time to add a protective layer that will enhance the colors and prevent any damage. Various techniques can be used for finishing, such as sanding the surface for a smooth finish or adding stains and varnishes for added depth and shine.
Once you have finished applying the desired finishes, it is important to seal your artwork properly. This step helps protect it from moisture, UV rays, and other environmental factors that could potentially damage the wood over time. Using a high-quality sealant specifically designed for wood burning art will ensure optimal protection while maintaining the integrity of your work. Remember, proper finishing and sealing techniques are essential in keeping your wood burning masterpiece looking stunning for years to come!
Applying Finishing Techniques and Sealants
When you’ve completed your wood burning masterpiece, it’s important to apply finishing techniques and sealants to protect and enhance the artwork. One popular option is to use a clear varnish or polyurethane coating. This not only adds a glossy finish but also helps preserve the wood from moisture and other environmental factors.
Another method is applying wax or oil-based finishes, such as beeswax or tung oil. These products can deepen the color of the burned design while providing a natural-looking matte or satin finish. Remember to carefully follow the instructions on your chosen finishing product and allow sufficient drying time before handling or displaying your artwork. With proper finishing techniques, you can ensure that your wood burning creations will last for years to come!
Displaying and Preserving Your Wood Burning Art
Once you’ve completed your wood burning masterpiece, it’s time to think about how you want to display and preserve your artwork. One option is to frame it and hang it on the wall for everyone to admire. A beautiful wood burning piece can add a touch of rustic charm to any room.
Another option is to use your art in functional ways, such as creating coasters or trivets. These items not only serve a practical purpose but also showcase your talent and creativity. To protect your wood burning art from damage and fading over time, consider applying a sealant or varnish that is specifically designed for use on wood surfaces.
Remember, each piece of wood burning art is unique and deserves its own special place in your home. Whether you choose to hang it on the wall or incorporate it into everyday items, displaying and preserving your creations will ensure they are enjoyed for years to come.
Troubleshooting Tips and Common Mistakes
When it comes to wood burning, even the most skilled artists encounter challenges. But don’t worry, troubleshooting is part of the learning process! One common mistake beginners make is applying too much pressure on the wood, resulting in uneven or deep burns. To avoid this, practice using a light touch and gradually increase pressure as you gain confidence.
Another issue that may arise is inconsistent heat distribution. This can be caused by a faulty burner or improper technique. Make sure your wood burning tool is functioning properly and try adjusting your hand position for more consistent results. Remember, patience and practice are key when troubleshooting wood burning projects!
Identifying and Fixing Common Wood Burning Issues
When it comes to wood burning, even the most experienced artists can encounter some common issues along the way. One of these issues is having a too hot or too cold tool temperature, which can affect the quality and consistency of your burn marks. To identify this issue, pay attention to how easily your tool glides across the wood surface. If it feels like you’re dragging or skipping, your tool may be too cold; if it’s scorching or leaving deep marks, then it’s likely too hot.
Another common issue is uneven burning or shading in your artwork. This can happen due to various factors such as uneven pressure applied while burning, inconsistent speed during strokes, or using dull tips that don’t distribute heat evenly. To fix this problem, practice applying consistent pressure and maintaining a steady pace when creating your burn lines. Additionally, regularly clean and sharpen your tips to ensure smooth and uniform burns throughout your artwork. By identifying and addressing these common wood burning issues head-on, you’ll be able to create stunning pieces with ease!
Tips for Avoiding Mistakes and Achieving Better Results
One of the keys to creating beautiful wood burning artwork is avoiding common mistakes and striving for better results. Here are some helpful tips to keep in mind:
1. Practice makes perfect: Before jumping into a major project, take the time to practice your wood burning skills on scrap pieces of wood. This will help you become more comfortable with the tool and allow you to refine your technique.
2. Start with simple designs: As a beginner, it’s best to start with simpler designs or patterns that are easier to execute. Gradually work your way up to more complex designs as you gain confidence and experience.
Remember, wood burning requires patience and precision, so take your time and enjoy the process! By following these tips, you’ll be well on your way to achieving better results in your wood burning projects. Keep experimenting and pushing yourself creatively!
Connecting with Other Wood Burning Enthusiasts
One of the best parts about starting a new hobby like wood burning is the opportunity to connect with fellow enthusiasts. Joining wood burning communities and forums is a great way to meet like-minded individuals who share your passion for this art form. These online platforms provide a space for sharing ideas, tips, and inspiration, as well as showcasing your own creations. Engaging in discussions and seeking advice from experienced artists can help you improve your skills and broaden your knowledge.
In addition to online communities, consider participating in wood burning workshops and classes. These provide hands-on learning experiences where you can interact with other artists face-to-face. Workshops often cover advanced techniques or specific projects, allowing you to learn from skilled instructors while connecting with peers who are also eager to expand their skills. Whether it’s through virtual interactions or in-person gatherings, connecting with other wood burning enthusiasts can be incredibly rewarding and will enhance your journey as an artist.
Joining Wood Burning Communities and Forums
Ready to take your wood burning skills to the next level? Joining wood burning communities and forums is a great way to connect with fellow enthusiasts who share your passion. These online spaces offer a wealth of knowledge, inspiration, and support from experienced artists.
In these communities, you can ask questions, seek advice on techniques or projects, and even showcase your own artwork for feedback. You’ll find a welcoming community eager to help you grow as an artist. So why wait? Dive into the world of wood burning by joining these vibrant communities today!
Participating in Wood Burning Workshops and Classes
Participating in wood burning workshops and classes is a fantastic way to improve your skills and connect with other enthusiasts. These educational experiences offer the opportunity to learn from experienced artists, gain insights into advanced techniques, and receive valuable feedback on your work.
In these engaging sessions, you can explore different wood burning styles and experiment with various tools under the guidance of knowledgeable instructors. Additionally, interacting with fellow participants allows for mutual learning and inspiration. So why not take advantage of these enriching opportunities to further enhance your wood burning journey?
Conclusion
Wood burning is a captivating and rewarding craft that allows you to unleash your creativity on a unique canvas. With the right wood burning kit, materials, and techniques, you can create stunning artwork that will impress both yourself and others.
By following this step-by-step tutorial, you now have the knowledge and tools to get started with wood burning. From selecting the right kit to preparing your workspace, learning different techniques to finishing and protecting your artwork – each section has provided valuable insights to help you begin your wood burning journey.
Remember, practice makes perfect! Don’t be discouraged if your first projects don’t turn out exactly as planned. Wood burning takes time and patience to master. Embrace any mistakes as opportunities for growth and improvement.
Additionally, connecting with other wood burning enthusiasts can be invaluable in expanding your skills and staying inspired. Joining online communities or attending workshops can provide a wealth of knowledge, tips, and support from experienced artists who share the same passion for this art form.
Now it’s time for you to take these steps forward into the world of wood burning. Set up your workspace, gather materials, choose a design or pattern that inspires you—and let your imagination run wild!
Get ready to create beautiful pieces of art using just heat and precision—a skill that will continue to bring joy for years to come. So grab your wood burner pen; let’s ignite those creative flames together!
Happy Wood Burning!
Introduction
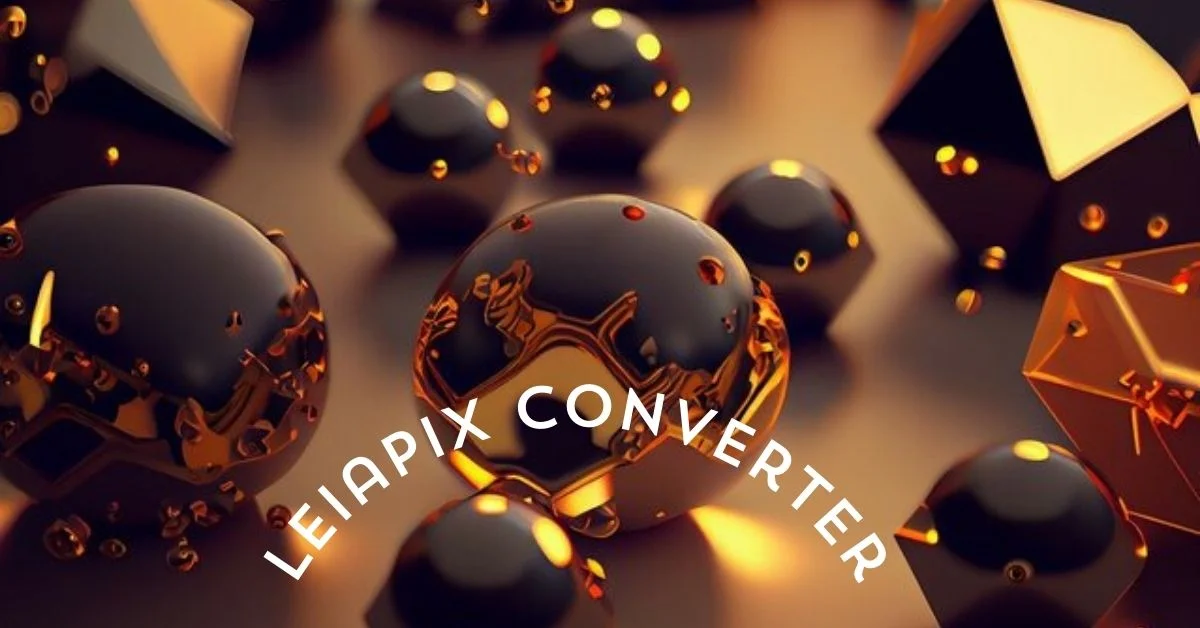
In a world where digital visuals are paramount, enhancing your images can make a significant difference. Whether you’re a photographer, digital artist, or marketer, LeiaPix Converter offers an exciting way to turn your flat, 2D images into engaging 3D visuals. Let’s dive into how this innovative tool can transform your creative projects.
What is LeiaPix Converter?
Definition and Purpose
LeiaPix Converter is a groundbreaking web application designed to convert traditional 2D photos into mesmerizing 3D images. By leveraging advanced AI technology, LeiaPix Converter generates depth maps that bring a new dimension to your visuals. This tool is perfect for anyone looking to add depth and dynamism to their images without requiring extensive 3D modeling expertise.

How It Works
LeiaPix Converter uses sophisticated algorithms to analyze the depth and contours of your 2D images. It then creates a depth map, which translates the flat image into a three-dimensional space. This process adds layers of depth, making your photos look more immersive and engaging.
Key Features of LeiaPix Converter
AI Technology
The heart of LeiaPix Converter lies in its use of artificial intelligence. The AI algorithms meticulously scan your images to create accurate depth maps, ensuring that the 3D effect is realistic and captivating.
Depth Map Generation
Depth maps are essential for creating 3D effects. LeiaPix Converter’s advanced depth map generation transforms ordinary images into dynamic 3D visuals by analyzing various depth levels within the image.
User-Friendly Interface
LeiaPix Converter boasts a clean and intuitive interface, making it accessible for both beginners and experienced users. With simple controls and straightforward steps, converting your images to 3D has never been easier.
Benefits of Using LeiaPix Converter
Enhanced Visual Appeal
One of the primary benefits of using LeiaPix Converter is the enhanced visual appeal of your images. The added depth and dimension make your visuals stand out, whether you’re showcasing artwork or promoting a product.
No Need for Advanced 3D Skills
Unlike traditional 3D modeling software, LeiaPix Converter doesn’t require advanced 3D skills. Its AI-driven process simplifies the conversion, allowing you to achieve impressive 3D effects without a steep learning curve.
Free Accessibility
LeiaPix Converter is available for free, making it an excellent tool for users on a budget. You can enjoy the full range of features without any cost, making it a valuable resource for digital creators of all kinds.
How to Use LeiaPix Converter
Step-by-Step Guide
Using LeiaPix Converter is straightforward. Here’s a step-by-step guide to help you get started:
- Upload Your Image: Start by uploading the 2D image you want to convert. LeiaPix Converter supports various file formats, including JPEG and PNG.
- Adjust Settings: Customize the depth settings to your liking. You can adjust parameters such as depth intensity and 3D effect strength to fine-tune the result.
- Download Your 3D Image: Once you’re satisfied with the adjustments, click the “Convert” button. After processing, download your newly created 3D image.
Uploading Your Image
Ensure your image is of high quality for the best results. The clearer the image, the more accurate the depth map will be, leading to a more impressive 3D effect.
Adjusting Settings
Experiment with different settings to find the perfect balance. You can tweak depth levels, shadows, and highlights to match your creative vision.
Downloading Your 3D Image
After conversion, download the 3D image to your device. You can now use it for various applications, from digital art to marketing materials.
Applications of 3D Images
Digital Art
Artists can use LeiaPix Converter to add a new dimension to their work. The 3D effects can make digital art pieces more engaging and visually striking.
Photography
Photographers can enhance their portfolios by turning 2D photos into 3D images. This added depth can make images more captivating and memorable.
Marketing and Social Media
In marketing and social media, eye-catching visuals are crucial. 3D images can draw more attention and increase engagement with your content.
Comparing LeiaPix Converter to Other Tools
LeiaPix vs. Traditional 3D Software
Traditional 3D software often requires extensive training and expertise. In contrast, LeiaPix Converter simplifies the process with its AI-driven approach, making 3D conversion accessible to everyone.
LeiaPix vs. Other AI 3D Converters
While there are other AI-powered 3D converters, LeiaPix stands out for its ease of use and effectiveness. Its depth map generation ensures high-quality 3D results with minimal effort.
Common Issues and Troubleshooting
Image Quality Problems
If your image quality isn’t up to par, ensure it’s high-resolution and clear. Low-quality images may produce subpar 3D effects.
Depth Map Errors
Occasionally, the depth map may not be perfect. Adjust the settings to improve accuracy or try uploading a different image.
Fixing Common Glitches
Restarting the tool or re-uploading the image can often resolve minor glitches. If problems persist, consult the LeiaPix support team for assistance.
Advanced Tips and Tricks
Optimizing Image Quality
For the best results, use high-resolution images. The more detail in your photo, the better the depth map and overall 3D effect.
Using LeiaPix Converter for Different Image Types
Experiment with various types of images, from portraits to landscapes. Each type may require different settings to achieve the best 3D effect.
Combining LeiaPix with Other Tools
You can enhance your 3D images further by combining LeiaPix with other editing tools. Use photo editors to fine-tune details and add finishing touches.
Case Studies and Success Stories
Examples of Stunning Transformations
Many users have achieved impressive results with LeiaPix Converter. From breathtaking digital art to captivating marketing visuals, the possibilities are endless.
User Experiences
User testimonials highlight how LeiaPix Converter has transformed their projects. Whether for personal or professional use, the feedback is overwhelmingly positive.
Conclusion
In summary, LeiaPix Converter is a powerful and accessible tool for transforming 2D images into dynamic 3D visuals. Its AI-driven technology simplifies the process, making it easy for anyone to enhance their images. Whether you’re a digital artist, photographer, or marketer, LeiaPix Converter offers a simple yet effective way to add depth and engagement to your visual content.
FAQs
What file formats does Lei’aPix Converter support?
LeiaPix Converter supports common file formats like JPEG and PNG.
Can Lei’aPix Converter handle high-resolution images?
Yes, Lei’aPix Converter can process high-resolution images to deliver detailed 3D effects.
Is Lei’aPix Converter free to use?
Yes, Lei’aPix Converter is available for free, offering all its features without any cost.
How long does it take to convert an image?
The conversion time depends on the image size and complexity, but it typically takes just a few minutes.
Are there any limitations on image size?
While there’s no strict size limit, very large images may take longer to process. For optimal results, use standard image sizes.
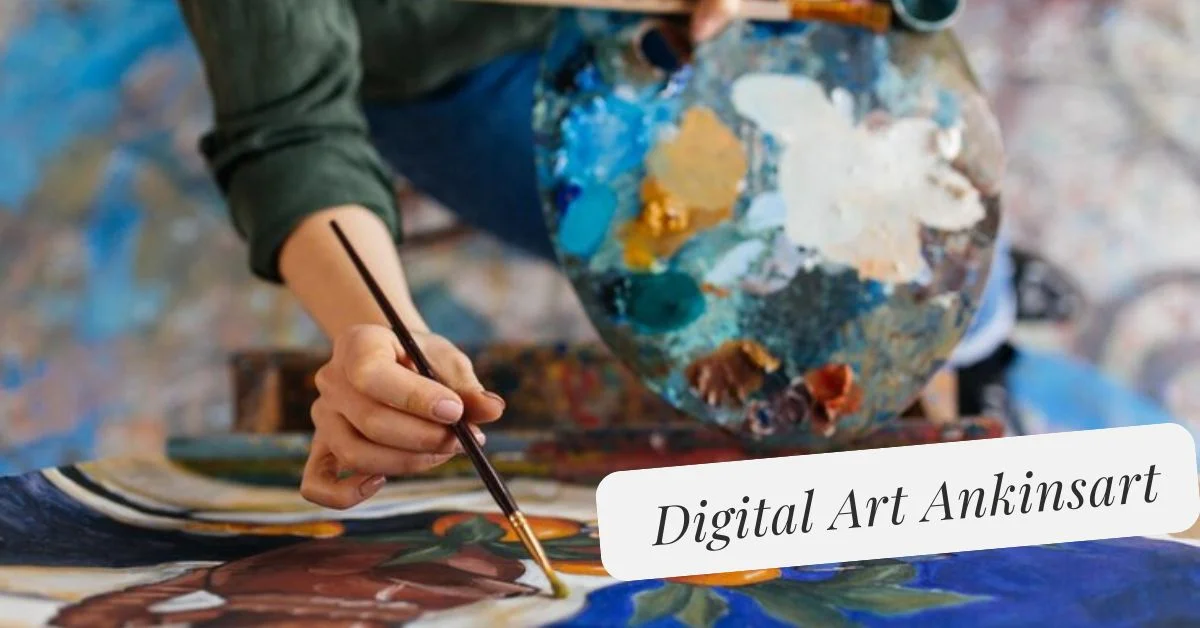
Introduction
Digital art has revolutionized the way we think about creativity and expression. Among the numerous styles and techniques, Digital Art Ankinsart stands out as a leading force shaping the future of artistic expression. This innovative approach blends advanced technology with artistic vision, offering fresh perspectives and redefining traditional boundaries.
What is Digital Art Ankinsart?

Digital Art Ankinsart represents a modern evolution in the world of digital artistry. Rooted in the broader context of digital art, Ankinsart is characterized by its distinctive techniques and methodologies. It encompasses a wide range of styles, each unique in its approach but unified by the use of digital tools.
The Rise of Digital Art
The evolution of digital art can be traced back to the advent of computer technology. From rudimentary pixel art to sophisticated digital masterpieces, the journey has been marked by significant milestones. Technological advancements have played a crucial role, enabling artists to explore new realms of creativity.
Key Features of Ankinsart
Ankinsart is recognized for its unique features that set it apart from traditional digital art. Key aspects include:
- Unique Techniques: Ankinsart employs distinctive methods to create visually striking pieces.
- Tools and Software: Artists utilize advanced software and hardware to bring their visions to life.
How Ankinsart is Transforming Artistic Expression
Digital Art Ankinsart is transforming artistic expression by breaking away from conventional norms. It offers new possibilities, allowing artists to explore uncharted territories and push the boundaries of traditional art forms. This innovation fosters a fresh perspective on creativity and artistic exploration.
The Creative Process Behind Ankinsart
The creation of Ankinsart involves several stages:
- Conceptualization: Artists begin with brainstorming and sketching initial ideas.
- Execution and Refinement: Using digital tools, they bring their concepts to life, refining their work through various iterations.
Case Studies of Notable Ankinsart Works
To understand the impact of Ankinsart, let’s look at some notable examples:
- Example 1: This piece exemplifies Ankinsart’s ability to blend technology with artistry, resulting in a groundbreaking visual experience.
- Example 2: Another significant work that showcases innovations introduced by Ankinsart, influencing the digital art community.
The Role of Technology in Digital Art Ankinsart
Technology is at the heart of Ankinsart. Key elements include:
- Software and Hardware Integration: The seamless combination of digital tools enhances the creative process.
- Impact on Creativity: Advanced technology expands artistic possibilities and allows for greater experimentation.
Challenges and Criticisms of Digital Art
Despite its advancements, digital art faces challenges and criticisms:
- Common Criticisms: Some argue that digital art lacks the authenticity of traditional mediums.
- Overcoming Challenges: Artists continually adapt and innovate to address these critiques and advance the field.
Future Trends in Digital Art Ankinsart
The future of Digital Art Ankinsart is bright, with several trends emerging:
- Emerging Techniques: New methods and technologies will continue to evolve.
- Predictions: Expectations for the future include even more integration of technology and art.
Ankinsart in the Commercial World
Ankinsart is making significant strides in the commercial realm:
- Market Trends: The demand for digital art is growing, with Ankinsart leading the charge.
- Opportunities for Artists: There are increasing opportunities for artists to showcase and monetize their work.
The Influence of Ankinsart on Other Art Forms
Ankinsart’s influence extends beyond digital art:
- Cross-Medium Influences: It has inspired and collaborated with other art forms, creating a rich, interdisciplinary dialogue.
- Collaborative Projects: Joint ventures between Ankinsart and other artistic disciplines highlight its broad impact.
How to Get Started with Digital Art Ankinsart
For those interested in exploring Ankinsart:
- Tools and Resources: Various software and resources are available to help beginners get started.
- Learning and Development: Continuous learning and practice are key to mastering Ankinsart techniques.
Conclusion
Digital Art Ankinsart is not just a style but a movement that is reshaping artistic expression. By merging technology with creativity, it offers new opportunities and challenges traditional notions of art. As we look to the future, Ankinsart promises to be at the forefront of artistic innovation, continually pushing the boundaries of what is possible.
FAQs
What distinguishes Ankinsart from other digi’tal art styles?
Ankinsart is unique due to its specific techniques and integration of advanced digital tools, setting it apart from other digital art forms.
What are some popular tools used in Ankinsart?
Common tools include advanced graphic design software and high-performance tablets, which facilitate intricate and detailed artistic creation.
How has Ankinsart influenced traditional art forms?
Ankinsart has introduced new techniques and concepts that have inspired and blended with traditional art forms, leading to innovative cross-medium works.
What future trends should we expect in digital art?
Emerging trends include increased use of virtual and augmented reality, more interactive art experiences, and continued advancements in digital technology.
Where can I learn more about digi’tal art Ankinsart?
To learn more, explore online courses, tutorials, and forums dedicated to digi’tal art and Ankinsart. Many artists also share insights through their social media and personal websites.

Introduction
In today’s fast-paced financial markets, having the edge can make all the difference between success and missed opportunities. Enter yPredict, a groundbreaking platform that merges artificial intelligence and machine learning to deliver sophisticated trading tools. Whether you’re an experienced trader or just starting out, yPredict’s innovative approach offers valuable insights and predictive capabilities that could transform your trading strategies. In this article, we will explore how yPredict stands out, its features, and how it can benefit advanced traders.
What is yPredict?
yPredict is a sophisticated trading research and analysis platform operating on the Polygon network. Designed for serious traders, it uses advanced algorithms to analyze vast amounts of financial data, providing users with predictive tools that can enhance their trading performance. The platform’s focus on AI and machine learning makes it a powerful tool for those looking to gain an edge in the competitive trading landscape.
The Technology Behind yPredict
At the core of yPredict’s innovation are its technological foundations. The platform employs a combination of AI and machine learning to process and analyze financial data. This technology allows for the creation of predictive models that offer actionable insights, helping traders to anticipate market movements and adjust their strategies accordingly.
Key Features of yPredict
1. Advanced Predictive Models: yPredict uses machine learning to develop sophisticated predictive models that can forecast market trends with high accuracy.
2. Real-Time Data Analysis: The platform provides real-time data analysis, enabling traders to make timely decisions based on the most current information.
3. User-Friendly Interface: Despite its advanced technology, yPredict offers an intuitive and easy-to-navigate interface, making it accessible for both novice and experienced traders.
4. Comprehensive Market Coverage: yPredict covers a wide range of financial markets, including stocks, cryptocurrencies, and forex, offering versatile tools for various trading needs.
How yPredict Enhances Trading Strategies
yPredict enhances trading strategies by providing actionable insights derived from its predictive models. Traders can use these insights to identify potential opportunities, minimize risks, and optimize their trading decisions. The platform’s ability to analyze large datasets and generate forecasts helps traders stay ahead of the curve and make data-driven decisions.
Benefits of Using yPredict for Advanced Traders
1. Increased Accuracy: Advanced predictive models improve the accuracy of market forecasts, leading to better trading decisions.
2. Time Efficiency: Real-time data analysis saves time by quickly processing large volumes of information and highlighting key insights.
3. Enhanced Decision-Making: Access to sophisticated tools and predictions helps traders make more informed and strategic decisions.
4. Versatility: yPredict’s broad market coverage allows traders to apply its tools across different financial markets.
Understanding the Polygon Network Integration
yPredict operates on the Polygon network, which is known for its scalability and low transaction costs. This integration ensures that users benefit from fast and efficient data processing, enhancing the overall performance of the platform. Polygon’s infrastructure supports yPredict’s sophisticated algorithms and provides a robust foundation for its predictive tools.
Artificial Intelligence in yPredict
AI is central to yPredict’s functionality. The platform uses AI to analyze historical and real-time data, identify patterns, and generate predictions. This technology enables yPredict to offer insights that are both accurate and actionable, helping traders navigate complex financial markets.
Machine Learning Algorithms
Machine learning algorithms are employed to refine predictive models continuously. By learning from past data and adjusting to new information, these algorithms improve the accuracy of predictions over time. yPredict’s use of machine learning ensures that its tools remain effective and relevant in a dynamic trading environment.
DAO Verification and Its Importance
One of yPredict’s unique features is its DAO (Decentralized Autonomous Organization) verification process. DAO members review and verify the platform’s trading models, ensuring their reliability and accuracy. This decentralized approach adds an extra layer of credibility to yPredict’s predictive tools and fosters trust within the trading community.
Comparing yPredict with Other Trading Platforms
When compared to other trading platforms, yPredict stands out for its advanced use of AI and machine learning. While many platforms offer basic analytics, yPredict’s predictive models and real-time data analysis provide a higher level of insight. Its integration with the Polygon network further distinguishes it by offering faster and more cost-effective transactions.
Real-Life Applications of yPredict
Traders have used yPredict to enhance their strategies across various markets. For instance, cryptocurrency traders utilize its predictive models to forecast price movements, while stock traders use real-time analysis to make timely investment decisions. The platform’s versatility and accuracy have made it a valuable tool for many in the trading community.
How to Get Started with yPredict
Getting started with yPredict is straightforward. Interested traders can sign up on the platform’s website, set up their accounts, and begin exploring its features. The user-friendly interface and comprehensive resources available on the platform make it easy to start leveraging yPredict’s advanced tools.
User Experiences and Testimonials
Many users have reported positive experiences with yPredict, highlighting its effectiveness in enhancing their trading strategies. Testimonials often praise the platform’s accuracy, ease of use, and the value it adds to their trading activities. These user experiences underscore yPredict’s reputation as a leading tool for advanced traders.
Conclusion
The 2024 GNU Gremlin is not just another snowboard; it represents a significant advancement in snowboarding technology. Its unique features, including the retro shape, mid flex, and C3 Aggressive All Terrain Contour, make it a standout choice for advanced riders. By integrating these features into a single board, the Gremlin delivers exceptional performance across various conditions, from powder to icy groomers. Whether you’re an experienced rider or looking to step up your game, the GNU Gremlin offers the tools you need to tackle the mountain with confidence and style.
FAQs
What makes yPredict different from other trading platforms?
yPredict differentiates itself with its advanced use of AI and machine learning, providing sophisticated predictive models and real-time data analysis that other platforms may not offer.
How does yPredict ensure the accuracy of its predictive models?
yPredict’s models are verified by DAO members, adding an extra layer of credibility and ensuring their reliability and accuracy.
Can yPredict be used for different types of trading?
Yes, yPredict covers various financial markets, including stocks, cryptocurrencies, and forex, making it a versatile tool for different trading needs.
What are the benefits of using AI in trading platforms like yPredict?
AI enhances trading platforms by providing accurate predictions, analyzing large datasets quickly, and offering actionable insights that improve trading strategies.
How do I get started with yPredict?
To get started with yPredict, sign up on the platform’s website, set up your account, and explore its features through the user-friendly interface and available resources.
-

 Fashion2 years ago
Exploring Purenudism: Embracing Body Positivity and Freedom
-
 Shops1 year ago
Staples Store Hours: What Time Does Staples Open And Close?
-
 Shops2 years ago
Walmart Vision Center Hours
-
 Shops1 year ago
Walgreen Pharmacy Hours: What Time Does It Open & Close?
-
 Shops1 year ago
Publix Pharmacy Hours and Locations
-

 Entertainment2 years ago
Thothub.lol: The Digital Realm of Entertainment
-
 Business2 years ago
Designer Clothing: Making a Statement
-
 Shops1 year ago
Walmart Deli Open & Close Hours