Fashion
Step-by-Step Tutorial: How to Create a Gorgeous Braided Headband
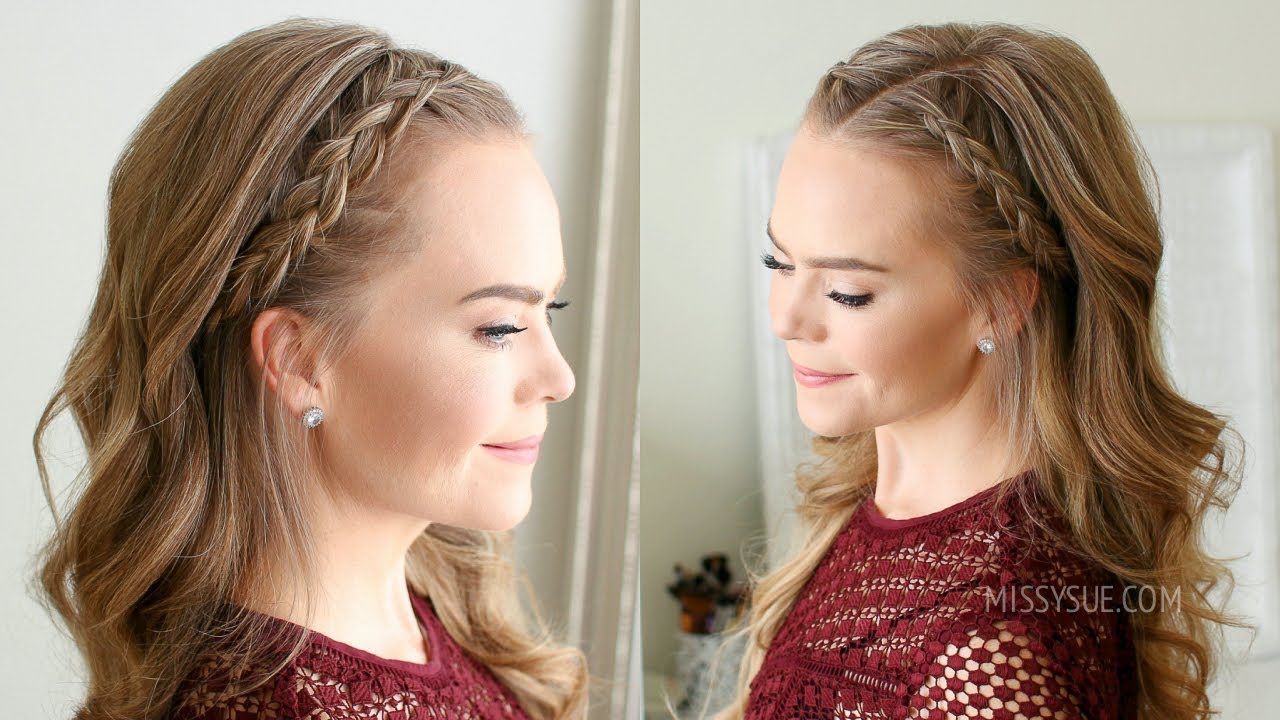
Are you tired of the same old hairstyles and looking for a way to spice up your look? Look no further than a gorgeous braided headband! This versatile hairstyle not only adds an element of elegance but also keeps your hair off your face, making it perfect for any occasion.
Creating a braided headband may seem daunting at first, but with the right materials and techniques, you’ll be able to achieve this stunning look in no time. In this step-by-step tutorial, we will guide you through the process of creating your own braided headband that will leave everyone in awe.
So grab your comb, brush, and favorite hair accessories – let’s dive into the world of braiding and discover how to create a beautiful braided headband that will make heads turn wherever you go!
Materials Needed
When it comes to creating a gorgeous braided headband, having the right materials is essential. Here’s what you’ll need:
First, gather a fine-toothed comb or brush to help detangle your hair and create smooth sections. This will ensure that your braid looks neat and polished.
Next, grab some clear elastics or small hair ties to secure your braid in place. These will keep everything snug and prevent any loose strands from escaping.
Depending on your preference, you can choose to use some styling products such as hairspray or texturizing spray for added hold and texture. These products can help enhance the look of your braided headband and make it last longer throughout the day.
With these materials on hand, you’re ready to start creating a stunning braided headband that will turn heads wherever you go!
Choosing the Right Braiding Technique
When it comes to creating a gorgeous braided headband, choosing the right braiding technique is key. There are so many different options out there, and finding the one that suits your hair type and desired look can make all the difference.
Consider your hair texture. If you have fine or thin hair, a traditional three-strand braid may be best as it will create a delicate and subtle headband effect. For those with thicker or curly hair, a Dutch or French braid may be more suitable as they provide extra security and hold.
Next, think about the style you want to achieve. If you’re going for an elegant and polished look, try a fishtail braid for its intricate detail. Want something boho-chic? Opt for a waterfall braid that cascades down the side of your head.
Don’t forget to experiment! Play around with different braiding techniques to find what works best for you. Whether it’s a classic braid or an innovative twist on tradition, embrace your creativity and have fun with it!
Step 1: Preparing the Hair
The first step in creating a stunning braided headband is to properly prepare your hair. Start by brushing out any tangles or knots using a wide-toothed comb. This will ensure that your hair is smooth and easy to work with during the braiding process.
Next, apply a small amount of leave-in conditioner or styling cream to add some extra moisture and shine to your locks. This will make it easier for you to manipulate your hair as you braid it.
Consider adding some texture to your hair before starting the braid. You can achieve this by using a curling iron or applying some texturizing spray. Adding a bit of wave or volume will give your braided headband an effortlessly chic look.
Step 2: Sectioning the Hair
To create a gorgeous braided headband, the next step is to section your hair properly. This ensures that you have the right amount of hair for your braid and makes it easier to work with.
Start by brushing your hair thoroughly to remove any tangles or knots. Then, using a comb, divide your hair into two sections – one at the front and one at the back. Take a small section from each side of your head near the temples and bring them forward.
Next, clip or tie up the rest of your hair so that it stays out of the way while you work on creating your braid. This will prevent any confusion or tangling as you go along.
Now that you have successfully divided and secured your hair, you’re ready to move on to actually starting the braid!
Step 3: Starting the Braid
Now that you have prepared your hair and sectioned it, it’s time to start braiding! This is where the real magic begins. Take a small section of hair from one side of your head, near the front. Divide this section into three equal parts – left, middle, and right.
Hold the left strand in your left hand and cross it over the middle strand. Then take the right strand and cross it over the new middle strand. Repeat this process, alternating between crossing strands from left to right and vice versa.
As you continue braiding, make sure to pull each strand tightly so that the braid stays secure. Keep adding small sections of hair from both sides as you proceed towards the back of your head. The key here is to maintain an even tension throughout for a neat and uniform look.
Get ready for some serious hairstyling skills in Step 4: Braiding Techniques! Stay tuned as we explore different ways to create stunning braided headbands that will turn heads wherever you go.
Step 4: Braiding Techniques
Now that you have mastered the art of starting your braid, it’s time to explore different braiding techniques to create a stunning headband. There are several variations to choose from, depending on the look you want to achieve.
The classic three-strand braid is always a safe choice. Simply divide your hair into three equal sections and cross them over each other, alternating left and right until you reach the end. This straightforward technique creates a clean and polished appearance.
For those looking for something more intricate, try a fishtail braid. Divide your hair into two sections and take a small strand from one side, crossing it over to join the opposite section. Repeat this process back and forth until you reach the end of your hair. The result is an elegant woven effect that adds texture to your headband.
If you’re feeling adventurous, experiment with Dutch or French braids. These styles involve incorporating additional strands of hair as you go along for added volume and complexity. Dutch braids are created by weaving strands under each other rather than over like in traditional braids, while French braids involve adding new sections of hair as you move down towards the nape of your neck.
With these various braiding techniques at your disposal, there’s no limit to how creative you can get with designing your perfect braided headband!
Step 5: Securing the Braid
Once you have completed your beautiful braided headband, it’s time to make sure it stays in place all day long. The last thing you want is for your hard work to unravel before anyone has a chance to admire it!
To secure the braid, start by gently pulling on the edges of the braid to loosen and widen it slightly. This will give it a fuller appearance and help hold it securely against your scalp. You can use bobby pins or small hair clips to anchor the ends of the braid behind your ear or underneath a layer of hair.
For added security, spritz some hairspray onto a toothbrush or fine-toothed comb and gently brush over any flyaways or loose strands around the crown of your head. This will help tame any frizz and keep everything looking neat and polished.
Remember, practice makes perfect when it comes to securing your braided headband. Don’t be afraid to experiment with different techniques until you find one that works best for you!
Step 6: Finishing and Styling
Now that you’ve completed the braided headband, it’s time to put the finishing touches on your gorgeous hairstyle! Here are some tips for achieving a flawless look.
First, gently tug at the braid to loosen it slightly. This will create a more voluminous and relaxed appearance. You can also use your fingers to carefully pull out small sections of hair along the edges of the braid for added texture.
Next, take a moment to smooth any flyaways or frizz using a lightweight hairspray or serum. Lightly mist or dab the product onto your fingertips and then run them over any unruly strands. This will help keep everything in place while still maintaining a natural-looking finish.
Consider accessorizing your braided headband with additional embellishments such as flowers, clips, or ribbons. These little extras can elevate your style even further and add an extra touch of personalization.
With these simple finishing techniques and creative styling options, you’ll be able to rock a stunning braided headband that is uniquely yours! So go ahead and experiment with different looks until you find one that suits your personality and complements your outfit perfectly.
Tips and Tricks for a Perfect Braided Headband
When it comes to creating a perfect braided headband, there are a few tips and tricks that can elevate your hairstyle to the next level. First and foremost, make sure your hair is properly prepared before starting the braid. This means washing and conditioning your hair, as well as applying any necessary styling products for added texture or hold.
Next, sectioning the hair is key to achieving a clean and precise braid. Use clips or elastics to separate the front section of your hair from the rest, ensuring that you have enough length to create a nice-sized headband. This will also help keep stray hairs from getting mixed up in the braid.
Now it’s time to start braiding! Whether you prefer a traditional three-strand braid or want to experiment with more intricate techniques like fishtail or Dutch braids, choose the style that best suits your desired look. Remember to keep your hands steady and maintain tension throughout each section of the braid for a neat finish.
These are just a few tips and tricks for creating a gorgeous braided headband. Experiment with different styles and techniques until you find what works best for you. With practice and patience, you’ll be able to create stunning hairstyles that turn heads wherever you go!
Frequently Asked Questions
- Can I create a braided headband if my hair is short?
Absolutely! The great thing about braided headbands is that they can be created with various hair lengths. If your hair is on the shorter side, you may need to use some bobby pins or small elastics to secure the braid in place. Experiment with different techniques and adapt them to suit your hair length.
2. How long does it take to create a braided headband?
The time required depends on your experience level and the complexity of the braid you choose. It can take anywhere from 10 minutes for a simple three-strand braid to 30 minutes or more for intricate styles like fishtail or Dutch braids. Take your time, practice, and enjoy the process!
3. Will a braided headband work with curly or textured hair?
Definitely! Braiding can add texture and definition to curly and textured hair types, making it even easier to create stunning braided headbands. Embrace your natural curls or waves when creating your desired look, whether it’s loose boho-inspired twists or tight woven patterns.
Remember, these are just a few common questions people have about creating braided headbands. Don’t hesitate to experiment, explore new techniques, and find what works best for you and your unique style!
Conclusion
Creating a gorgeous braided headband may seem intimidating at first, but with the right materials and techniques, anyone can achieve this stunning hairstyle. Whether you’re looking to add a touch of boho chic to your everyday look or want an elegant accessory for a special occasion, a braided headband is the perfect choice.
By following our step-by-step tutorial, you’ll be able to create a beautiful braided headband that will leave everyone in awe. Remember to prepare your hair properly by washing and conditioning it before starting the process. Sectioning the hair is crucial for achieving clean and neat sections for your braid.
Choosing the right braiding technique depends on the look you want to achieve. From classic three-strand braids to more intricate fishtail or Dutch braids, there are endless possibilities to explore. Experiment with different styles until you find one that suits you best.
Securing the braid is essential for ensuring it stays in place all day long. Utilize bobby pins or small elastics strategically hidden within your hair to keep everything secure and seamless. Once secured, feel free to style and accessorize as desired.
To ensure success with each attempt at creating a braided headband, here are some tips and tricks:
1. Practice makes perfect – don’t get discouraged if it doesn’t turn out perfectly on your first try.
2. Use products such as texturizing spray or dry shampoo to add grip and hold.
3. Don’t be afraid of imperfections – sometimes messy-looking braids can actually enhance the overall effect.
4. Experiment with different accessories like flowers, ribbons, or sparkly clips.
5. Take inspiration from tutorials online or seek professional help if needed.
Now that you have all the tools necessary for creating an amazing braided headband hairstyle let your creativity flow! Have fun experimenting with various techniques and styles until you find what works best for you!
Introduction
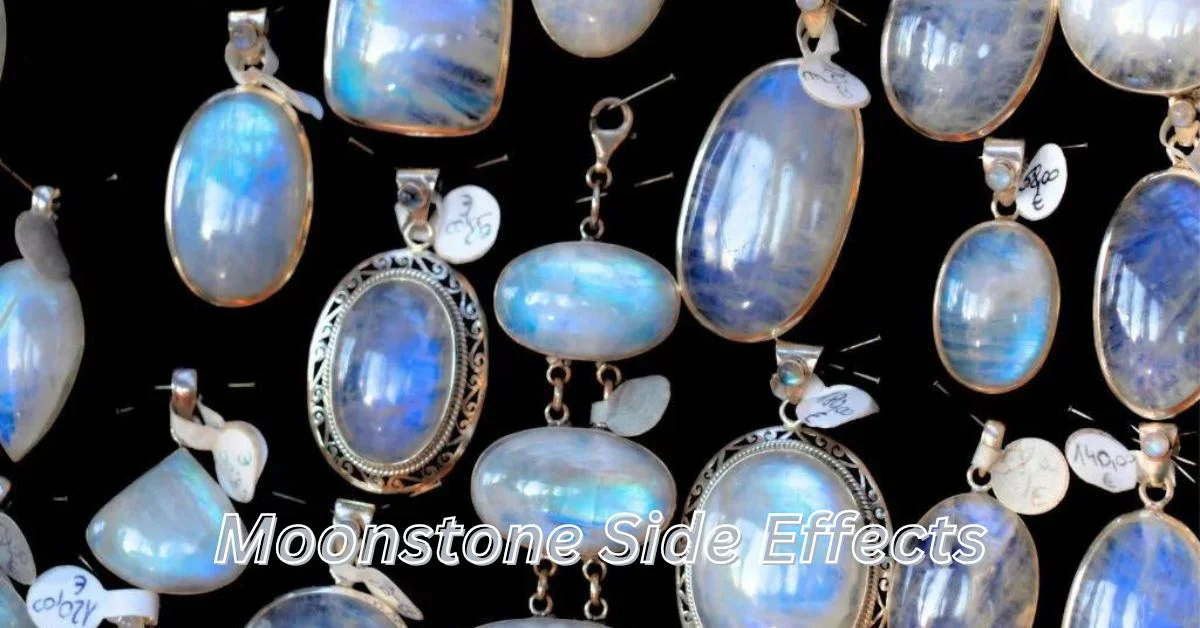
Moonstone, with its ethereal glow and shimmering beauty, has enchanted people for centuries. Often associated with mystical properties and emotional healing, this gem is a favorite among crystal enthusiasts and jewelry lovers alike. But as with all things, it’s essential to be aware of both the benefits and potential side effects of moonstone.
What is Moonstone?
Historical and Cultural Significance
Historically, moonstone has been revered in various cultures. Ancient Romans believed it was formed from moonlight, while in Hinduism, it is associated with the moon god, Chandra. Its use in ancient jewelry and its symbolic significance make moonstone a gem steeped in rich cultural heritage.
Moonstone in Modern Times
Potential Side Effects of Moonstone
Understanding the Physical Side Effects
- Skin Reactions: Some individuals may experience skin irritations or allergic reactions when coming into contact with moonstone, particularly if it’s set in jewelry. Symptoms might include redness or itching.
- Allergic Reactions: Although rare, moonstone can cause allergic reactions in sensitive individuals. If you notice any unusual symptoms, it’s best to discontinue use and consult a healthcare professional.
- Sensitivity to Light: Moonstone’s adularescence can sometimes cause visual discomfort, especially in bright light. This effect is usually mild but can be bothersome for some.
Emotional and Psychological Side Effects
- Mood Swings: Some users report experiencing mood swings or emotional instability when wearing moonstone. This is believed to be due to the stone’s purported influence on emotional energy.
- Sleep Disturbances: The energizing properties of moonstone might lead to sleep disturbances or restless nights for certain individuals, particularly if worn close to bedtime.
- Anxiety and Stress: For some, the metaphysical properties of moonstone might amplify feelings of anxiety or stress rather than alleviating them.
Who Should Avoid Moonstone?
- People with Certain Health Conditions: If you have specific health issues, especially those related to skin sensitivities or mental health, it might be wise to avoid moonstone or consult a doctor before use.
- Pregnant Women: Pregnant women should exercise caution with any gemstone or crystal, including moonstone, due to the potential for unexpected effects.
- Children: Given their sensitivity to external stimuli, children may react differently to moonstone. It’s advisable to monitor their reactions carefully.
Precautions and Safety Tips
- Proper Usage: To minimize any adverse effects, use moonstone in moderation and be mindful of how it affects you personally.
- Care and Maintenance: Proper care of moonstone jewelry can prevent physical reactions. Clean the stone gently and avoid exposing it to harsh chemicals.
- Consulting Professionals: If you’re unsure about how moonstone might affect you, consider seeking advice from a gemologist or a healthcare provider.
How to Choose the Right Moonstone
- Quality and Authenticity: Ensure you purchase moonstone from reputable sources to avoid counterfeit stones that might have added materials or coatings causing adverse effects.
- Purchasing Tips: Look for clear, unblemished moonstones with a strong adularescence for the best experience and minimal side effects.
- Avoiding Counterfeits: Be cautious of overly cheap moonstones or those with unusual characteristics, as these might be synthetic or altered.
Alternative Crystals to Consider
Moonstone Myths and Misconceptions
- Common Misunderstandings: Some myths suggest that moonstone can bring bad luck or cause illness. In reality, these are unsubstantiated and likely stem from misunderstandings about the stone’s properties.
- Debunking myths: Scientific and anecdotal evidence shows that while moonstone may have effects, these are usually not harmful and should be assessed individually.
Expert Opinions on Moonstone Side Effects
- Insights from Gemologists: Gemologists generally view moonstone as a safe and beneficial gem, though individual reactions can vary.
- Feedback from Users: Many users report positive experiences with moonstone, though a small percentage may experience side effects.
Conclusion
Moonstone is a captivating gemstone with a range of benefits and potential side effects. Understanding these effects helps you make informed decisions about incorporating moonstone into your life. Always listen to your body and consult professionals if you’re unsure about its impact on you.
FAQs
What are the most common side effects of moonstone?
The most common side effects include skin irritations, mood swings, and sleep disturbances.
Can moonstone cause allergic reactions?
Yes, although rare, moonstone can cause allergic reactions in sensitive individuals.
How can I ensure my moonstone is authentic?
Purchase from reputable sellers and check for quality certifications to ensure authenticity.
What should I do if I experience negative effects from moonstone?
Discontinue use and consult a healthcare professional for advice.
Introduction
Aquaphor has long been a staple in many households, known for its ability to soothe and protect dry, irritated skin. But a new curiosity has emerged: can this versatile ointment double as an intimate lubricant? This question has sparked interest among those looking for multipurpose products and alternatives to specialized lubricants. In this article, we will explore the feasibility of using Aquaphor as lube, its safety implications, and what you should consider before making this decision.
Understanding Aquaphor
What is Aquaphor?
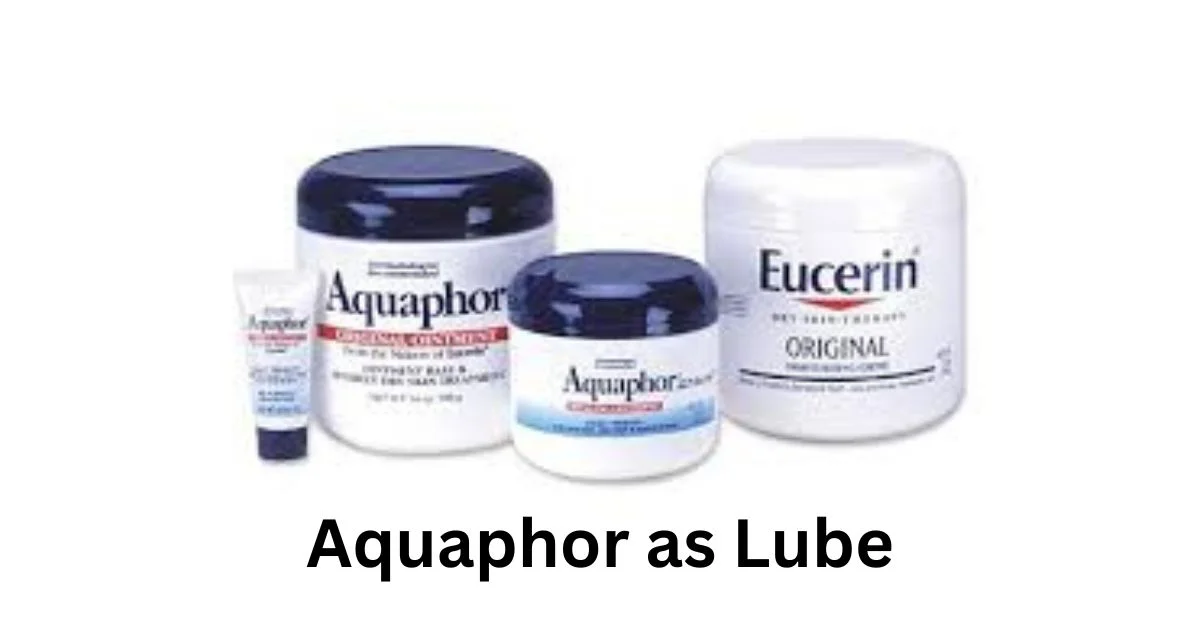
Aquaphor is an ointment produced by Eucerin, primarily designed to relieve and protect dry, chapped skin. Its formulation includes a blend of petrolatum, mineral oil, and other emollients that create a barrier on the skin, which helps retain moisture and promote healing.
Key Ingredients and Their Functions
- Petrolatum: Acts as an occlusive agent to lock in moisture.
- Mineral Oil: Helps to soften and smooth the skin.
- Glycerin: A humectant that draws moisture from the environment into the skin.
Intended Uses and Benefits
Aquaphor is commonly used to treat conditions such as eczema, psoriasis, and minor burns. Its gentle formulation makes it a popular choice for sensitive skin areas, but it was never intended for use as a lubricant.
The Question: Can Aquaphor Be Used as Lube?
Common Misconceptions
Many people assume that if a product is good for skin, it must be good for all skin-related uses, including lubrication. However, just because Aquaphor is beneficial for skin care doesn’t mean it’s suitable for intimate areas.
Why People Consider Using Aquaphor as Lube
The idea of using Aquaphor as a lubricant likely stems from its smooth texture and moisturizing properties. People looking for alternatives to commercial lubricants might see Aquaphor as a readily available option.
Overview of Popularity and Curiosity
Curiosity about using Aquaphor as lube reflects a broader trend of seeking multipurpose products and exploring non-traditional uses for everyday items.
Safety Considerations
Ingredient Safety for Intimate Areas
Aquaphor’s ingredients are designed for external skin use and might not be suitable for intimate areas. Petrolatum and mineral oil, while safe for skin, may cause irritation or disrupt the natural balance of sensitive areas.
Potential Risks and Reactions
Using Aquaphor as a lubricant may lead to allergic reactions or infections. The product is not formulated to be used internally and might not provide the same safety and comfort as specialized lubricants.
Hygiene and Sterility Concerns
Aquaphor is not a sterile product, and using it in intimate areas could introduce bacteria or pathogens, increasing the risk of infections. Specialized lubricants are designed with sterility and safety in mind.
Comparing Aquaphor with Specialized Lubricants
Water-Based Lubricants
Water-based lubricants are a popular choice due to their compatibility with condoms and sex toys. They are easy to clean up and generally safe for sensitive skin. Look for products without parabens or glycerin for a more natural option.
Silicone-Based Lubricants
Silicone-based lubricants provide long-lasting lubrication and are water-resistant, making them suitable for various activities. However, they may degrade silicone toys and require careful cleaning.
Oil-Based Lubricants
Natural oils like coconut oil can be used for external lubrication but should not be used with latex condoms, as they can weaken the latex. Oil-based lubes are not recommended for internal use.
Pros and Cons of Using Aquaphor as Lube
Benefits
- Moisturizing Properties: Aquaphor’s ability to hydrate the skin might offer some level of lubrication.
- Availability: Easily accessible in many households.
Drawbacks and Limitations
- Potential Irritation: Not designed for intimate areas, may cause irritation.
- Lack of Sterility: Increases risk of infections.
- Texture Issues: May not provide adequate or lasting lubrication.
Alternatives to Aquaphor for Intimate Lubrication
Best Water-Based Lubricants
- K-Y Jelly: A well-known brand for its gentle formulation.
- Sliquid H2O: Offers a natural, glycerin-free option.
Top Silicone-Based Lubricants
- Pjur Original: Long-lasting and suitable for various activities.
- Astroglide X: Provides a smooth, extended glide.
Safe Natural Oils for Lubrication
- Coconut Oil: Hydrating and naturally antimicrobial but not compatible with latex condoms.
- Almond Oil: A mild, moisturizing option but should be used cautiously.
How to Choose the Right Lubricant
Factors to Consider
- Compatibility: Ensure the lubricant works with condoms and sex toys.
- Personal Sensitivities: Choose a product that suits your skin type and preferences.
Matching Lubricants to Needs and Preferences
Consider what type of activities you’ll be engaging in and choose a lubricant that offers the appropriate level of comfort and effectiveness.
Conclusion
While the idea of using Aquaphor as lube may be intriguing, it’s essential to prioritize safety and effectiveness. Aquaphor is not designed for intimate lubrication and may pose risks such as irritation or infection. Opting for specialized lubricants, whether water-based, silicone-based, or natural oils, ensures a safer and more comfortable experience. Always consider your health and well-being when choosing products for intimate use.
FAQs
What are the risks of using Aquaphor as lube?
Using Aquaphor as a lubricant can lead to irritation, allergic reactions, or infections due to its ingredients and lack of sterility.
Can Aquaphor cause infections or irritation?
Yes, Aquaphor may disrupt the natural balance of intimate areas and increase the risk of infections or irritation.
What are the best alternatives to Aquaphor for lubrication?
Water-based, silicone-based, and safe natural oil lubricants are better alternatives, each offering specific benefits and suitability for different needs.
How do water-based lubes compare to silicone-based lubes?
Water-based lubes are easier to clean and safe for most activities, while silicone-based lubes offer longer-lasting lubrication and are water-resistant.
Are natural oils a safe option for lubrication?
Natural oils like coconut oil can be used for external lubrication but should not be used with latex condoms, as they can weaken the latex.

Introduction
Choosing the right costume can set the tone for your entire event, and if you’re a fan of classic arcade games, a Donkey Kong costume is a fantastic choice. This article delves into the top 10 Donkey Kong costumes for 2024, offering something for everyone, whether you’re attending a Halloween party, a gaming convention, or a fun themed event.
Why Choose a Donkey Kong Costume?
Popularity and Iconic Status
Donkey Kong is not just a character; he’s a piece of video game history. With his robust physique, signature red tie, and larger-than-life personality, Donkey Kong has become a beloved figure across generations. Choosing a Donkey Kong costume taps into that nostalgia and ensures you’ll stand out in a crowd.
Versatility for Different Occasions
From Halloween to cosplay events, Donkey Kong’s appeal transcends various themes. His distinctive look allows for creative interpretations, making him a versatile choice for any event.
Top 10 Donkey Kong Costumes for 2024
1. Classic Donkey Kong Costume
Description: This costume captures the essence of Donkey Kong with its recognizable brown fur, red tie, and signature “DK” logo. It’s a classic choice that never goes out of style.
Why it’s a great choice: The classic Donkey Kong costume is perfect for those who want to stay true to the original look of the character. It’s ideal for Halloween and general cosplay events, offering a timeless appeal.
2. Donkey Kong and Diddy Kong Duo Costume
Description: Perfect for pairs, this costume set includes both Donkey Kong and his trusty sidekick, Diddy Kong. It’s a great way to coordinate with a friend or significant other.
Ideal for pairs: This duo costume adds a fun element to any event, making it a hit at themed parties and conventions. It’s also a great conversation starter!
3. Donkey Kong Inflatable Costume
Description: The inflatable Donkey Kong costume offers a playful twist on the classic design. It features a large, balloon-like structure that makes you look like you’re right out of the game.
Advantages of inflatable costumes: These costumes are not only eye-catching but also comfortable, allowing for easy movement and ventilation. They’re perfect for those who want to make a bold statement without sacrificing comfort.
4. Donkey Kong Super Mario Kart Costume
Description: Inspired by Donkey Kong’s appearance in the Super Mario Kart games, this costume features racing gear and a helmet, giving you a dynamic, action-ready look.
Perfect for gaming events: If you’re heading to a gaming convention or a Mario Kart-themed party, this costume is a perfect choice. It combines Donkey Kong’s iconic look with a sporty twist.
5. Donkey Kong with Accessories
Description: Enhance your Donkey Kong costume with additional accessories like a faux banana, a barrel prop, or even a custom red tie with the DK logo.
Adding extra flair: Accessories can elevate your costume, making it stand out even more. They also offer opportunities for interactive fun during your event.
6. DIY Donkey Kong Costume
Description: For those who enjoy crafting, a DIY Donkey Kong costume is a great project. You can customize the look to your liking and ensure it’s a unique representation of the character.
How to create your own: Gather materials such as brown fabric, a red tie, and face paint. There are plenty of tutorials online to guide you through the process, making it a fun and rewarding project.
7. Retro Arcade Donkey Kong Costume
Description: This costume pays homage to the classic arcade game with pixelated designs and retro details, perfect for fans of the original game.
Nostalgic appeal: If you’re a fan of the vintage gaming era, this costume offers a nostalgic trip back to the golden days of arcade games.
8. Donkey Kong Mask with Casual Outfit
Description: For a more relaxed approach, pair a Donkey Kong mask with a casual outfit. It’s a simple yet effective way to show off your fandom.
Comfort and ease: This option is ideal for those who want a low-maintenance costume that’s still instantly recognizable. It’s also great for last-minute events.
9. High-Quality Donkey Kong Suit
Description: For those who want to invest in a premium costume, a high-quality Donkey Kong suit offers an authentic look with attention to detail and superior materials.
Premium options: These suits often feature high-quality fabric and construction, ensuring durability and a great fit. They’re perfect for serious cosplayers and collectors.
10. Donkey Kong Baby Costume
Description: Adorable and fun, the Donkey Kong baby costume is perfect for the little ones. It features a soft, comfortable design that’s easy to put on and take off.
Adorable for little ones: If you have a baby or toddler, this costume is a charming way to include them in the fun. It’s designed for comfort and ease, making it ideal for young children.
How to Choose the Perfect Donkey Kong Costume
Considerations for Fit and Size
Choosing the right size ensures comfort and a good fit. Be sure to check the sizing charts and consider whether you want a loose or fitted costume.
Material and Comfort
Opt for materials that are breathable and comfortable, especially if you’ll be wearing the costume for extended periods. Look for options with good ventilation and easy-to-wear features.
Budget and Quality
Balance your budget with quality. Higher-end costumes may offer better materials and details, but there are also affordable options that look great. Decide what fits best within your budget while still meeting your expectations for quality.
Where to Buy Donkey Kong Costumes
Online Retailers
Websites like Amazon, eBay, and specialty costume shops offer a wide range of Donkey Kong costumes. You can compare prices and read reviews to find the best option.
Specialty Stores
Visit stores that specialize in costumes and cosplay gear. They often have a selection of high-quality options and can provide expert advice.
Custom Options
For a truly unique costume, consider custom-made options. Many online retailers and local costume shops offer customization services to create a one-of-a-kind Donkey Kong look.
Tips for Wearing and Maintaining Your Costume
Comfort Tips
Wear comfortable underlayers and ensure your costume fits well. Practice wearing it before your event to adjust any fittings and make sure you’re comfortable moving around.
How to Care for Your Costume
Follow the care instructions provided with your costume. Regularly clean and store it properly to maintain its condition for future use.
Conclusion
Donkey Kong costumes offer a fantastic way to celebrate this iconic character, whether you’re attending a Halloween party, a cosplay event, or a themed gathering. From classic looks to innovative designs, there’s a Donkey Kong costume for every fan. Consider your preferences, budget, and the occasion to choose the perfect outfit that will make you the center of attention.
FAQs
Where can I find the best Donkey Kong costumes?
You can find Donkey Kong costumes at online retailers like Amazon and specialty costume shops. For custom options, check local costume stores or custom costume websites.
How can I make a DIY Donkey Kong costume?
Create a DIY Donkey Kong costume using brown fabric, a red tie with the DK logo, and face paint. There are many online tutorials to guide you through the process.
What is the best material for a Donkey Kong costume?
Opt for breathable and comfortable materials like cotton or polyester blends. Ensure the fabric is durable and easy to move in for extended wear.
Are there Donkey Kong costumes for kids?
Yes, there are many adorable Donkey Kong costumes designed for children, including baby and toddler sizes. These are typically made from soft, comfortable materials.
How do I maintain and store my Donkey Kong costume?
Follow the care instructions provided with your costume. Store it in a cool, dry place and clean it according to the manufacturer’s guidelines to keep it in good condition.
-

 Fashion2 years ago
Exploring Purenudism: Embracing Body Positivity and Freedom
-
 Shops1 year ago
Staples Store Hours: What Time Does Staples Open And Close?
-
 Shops1 year ago
Walgreen Pharmacy Hours: What Time Does It Open & Close?
-
 Shops2 years ago
Walmart Vision Center Hours
-
 Shops1 year ago
Publix Pharmacy Hours and Locations
-
 Business2 years ago
Designer Clothing: Making a Statement
-
 Shops1 year ago
Walmart Deli Open & Close Hours
-

 Entertainment2 years ago
Roku Red, White, and Blue: Streaming the cultural heart of America